I've got a little more to show you...
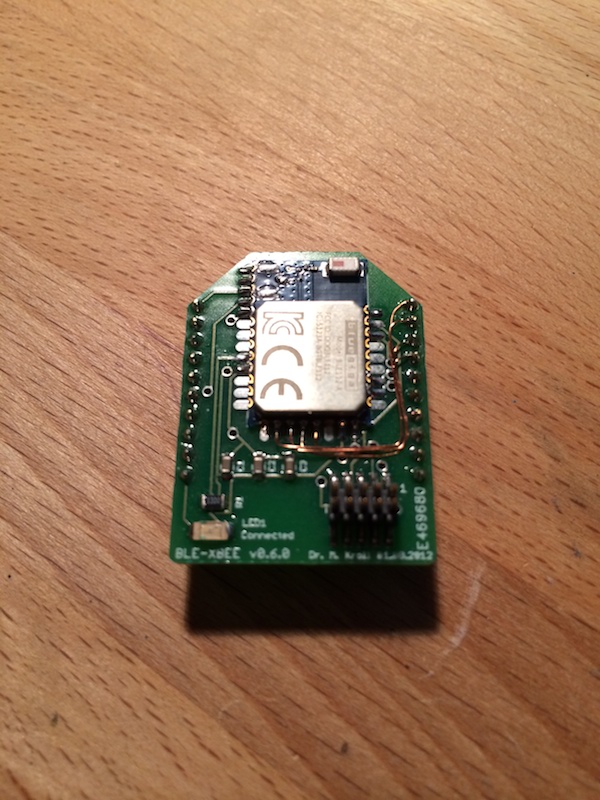
No, no it’s not the iPad-Mini. After I created the BLE-Shield in Arduino Shield form factor, I shrinked the BLE-Shield to an XBEE size form factor and added even a little more functionality.
The idea behind it was quite simple. Now that I developed the BLE-Shield, why not shrink it to an XBEE form factor, name it BLEbee and use it with an Arduino FIO or the Arduino Wireless Shield, where an XBEE module can be used. The following image shows how it looks like:
The services and characteristics are similar to the ones provided by the BLE-Shield. But there is one more thing (I’m a little addicted to Apple phrases in this post). It not only one but four.
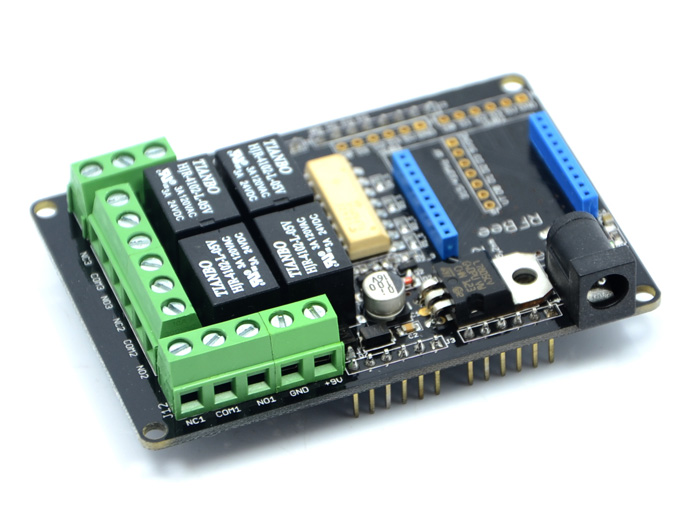
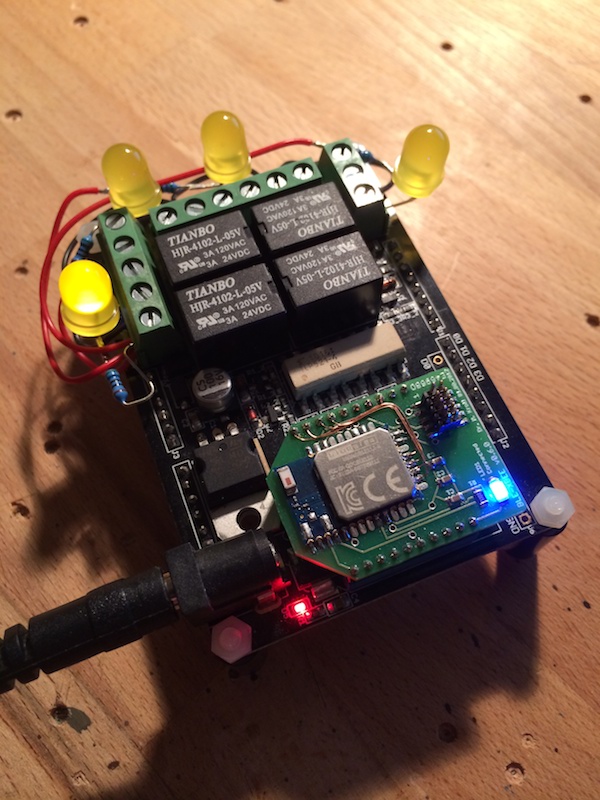
It was not the only idea to use the BLEbee in an Arduino FIO. My first firmware I created using Bluegiga’s DKBLE112 was a firmware to switch LEDs on and off which I attached to the eval board. In the second step I wanted to attach relays to it, in order to switch devices such as Lamps on and off. Having all the firmwares already developed I was looking at Seeedstudio’s Relay Shield. It can be used as Arduino Shield but standalone as well since it provides an XBee socket for XBees or their RFBee. You can find the details on how to use their relay shield on their website (http://www.seeedstudio.com/depot/relay-shield-p-693.html?cPath=132_134).
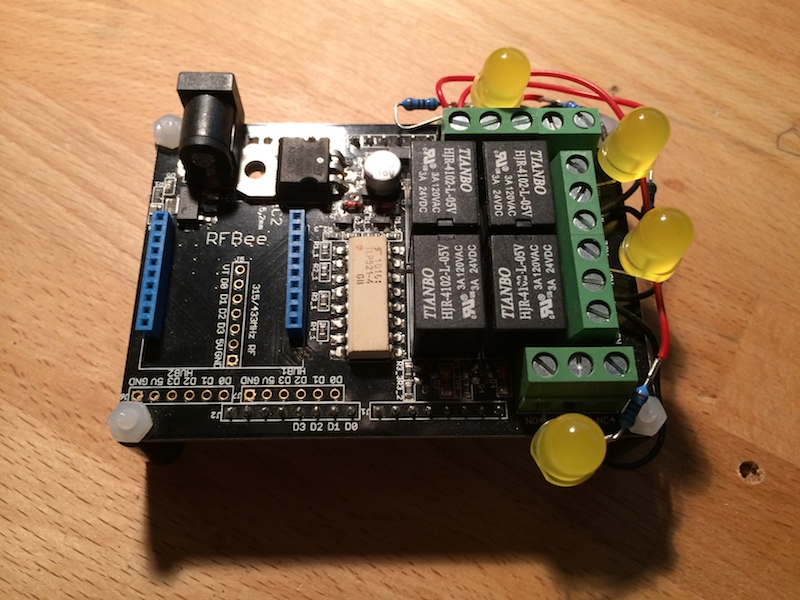
What I finally did, was to enable four GPIO pins of the BLE112 to be connected to the XBee pins which are necessary to switch the four relays of the shield on and off.
I created a small setup with four LEDs and resistors to drive the LEDs through the 9V voltage available on the shields header. This weird setup is shown in the picture below. Big yellow 10mm LEDs will be controlled by the relays:
So now take a short look at the services and characteristics of the BLEbee by opening up BLExplr and search for devices and after you connected to it you can see its service and after selecting the BLEBee Service you can see it’s characteristics:
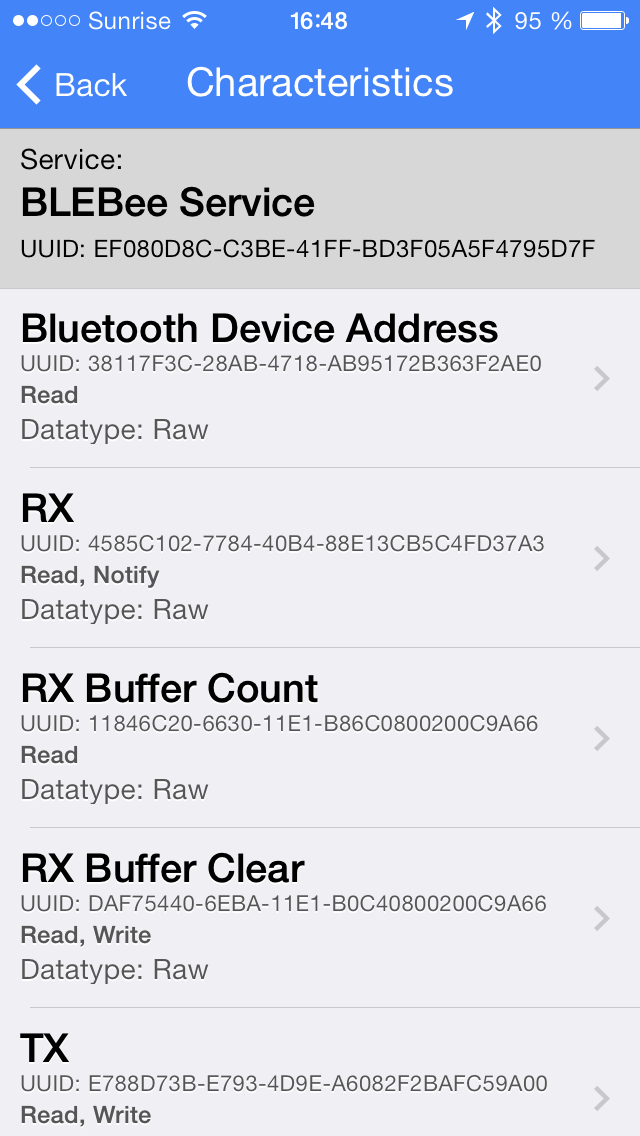
Of course there is a BLEbee service. It seems as we are BLE exploring the BLE-Shield, but:
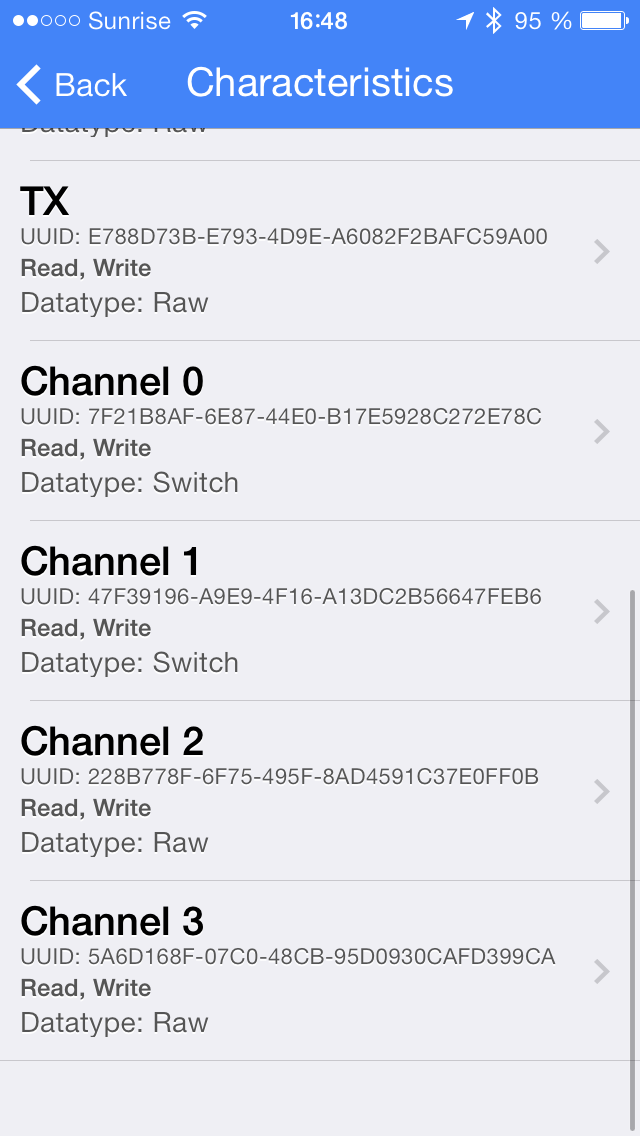
The new characteristics are the D0-D3 Output ones, which are available at pins 20, 19, 18 and 17 of the BLEbee pins. On the Relay Shield, these pins are used to control the relays.
If you now select e.g. the D0 output, there is no the well known read/write characteristic screen shown in BLExplr. In v1.0.4 of BLExplr I introduced a new datatype to the UUID dictionary, which is configurable on the service side. I never explained why I designed the app the way to use the server side UUID dictionary. In CoreBluetooth there is a way to get a name of the characteristic which can be read using I think the call
- (void)discoverDescriptorsForCharacteristic:(CBCharacteristic *)characteristic;
of CBPeripheral (correct me if I’m wrong), but in my server side dictionary there are more flags that can be set for a given characteristic. The magic is behind the datatype, I can define for a 3rd party characteristic as well. For the D0-D3 Output Characteristics, I added the following configuration:
<dict>
<key>uuid</key>
<string>0x7F21B8AF6E8744E0B17E5928C272E78C</string>
<key>name</key>
<string>D0 Output</string>
<key>datatype</key>
<string>switch</string>
<key>on-value</key>
<string>0xff</string>
<key>off-value</key>
<string>0x00</string>
</dict>
So what you can see here is, that the Characteristic’s value is changed to digital high, when you write 0xff to it, and digital low if you write 0x00 to it. Using the datatype “switch” of the characteristic, BLExplr will render an on/off switch instead of a write button, where you have to enter the hex value manually to turn the switch on or of.
The convenient BLExplr UI looks like this:
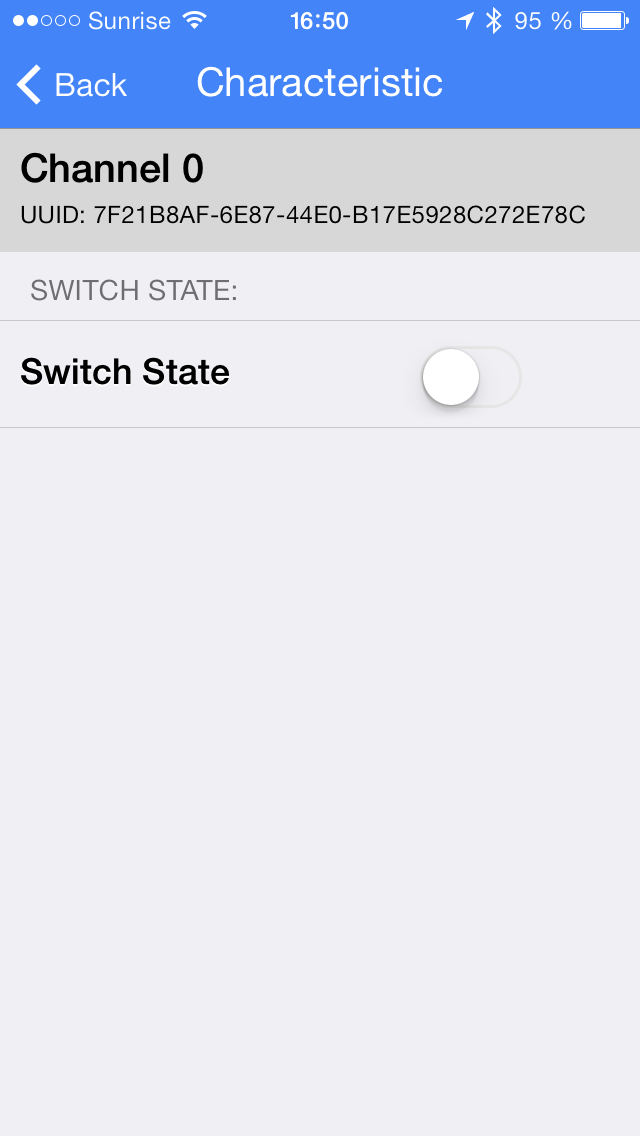
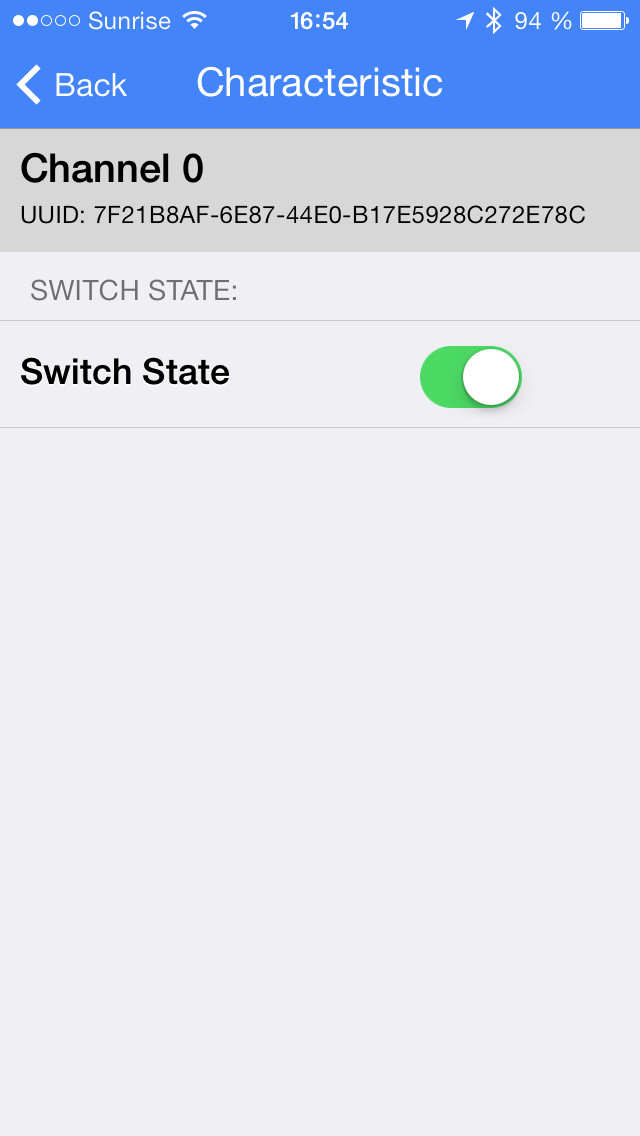
Press the UISwitch… and the Yellow LED connected to first LED will turn on…
and finally the switch state in BLExplr is changed as well…
Other Projects using BLEbee:
Using the BLEbee an even smaller thermometer using the Arduino FIO and a SHT15 breakout board can be realized:
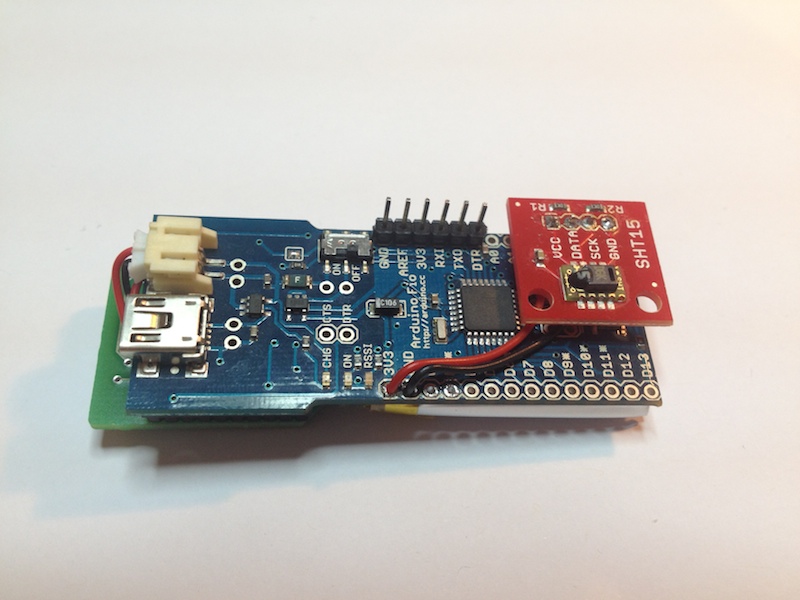
The sketch is the same what I’m using in the BLE-Shield Thermometer Sketch. More things to come, but this will be covered in another post, once these things are ready to show.
Thanks for reading,
Michael.